template

Monday, December 02, 2013

Reusable Advent Calendar

'Tis the Season! 

I LOVE Christmas. The sights, sounds, and smells. The cozy feeling of settling in front of a fire with a warm mug of tea, (hot chocolate with Baileys...)  The business of downtown streets with shoppers looking for that perfect gift. I know, I know, who really likes the business... but I must admit I do. I don't particularly love the traffic that goes along with it, but thethe hustle and bustle on the sides walks I do enjoy. I love getting cozied up in sweaters, scarves, and boots. It's a lovely time of year.

I also love the anticipation. The waiting. The enjoying of every day leading up to the BIG one. So what follows is a DIY Re-fillable Advent Calendar.

Supplies Needed:
24 wooden clothes pins
1 - 1 x 6 x 4ft plank of wood
Wood Glue
Sandpaper
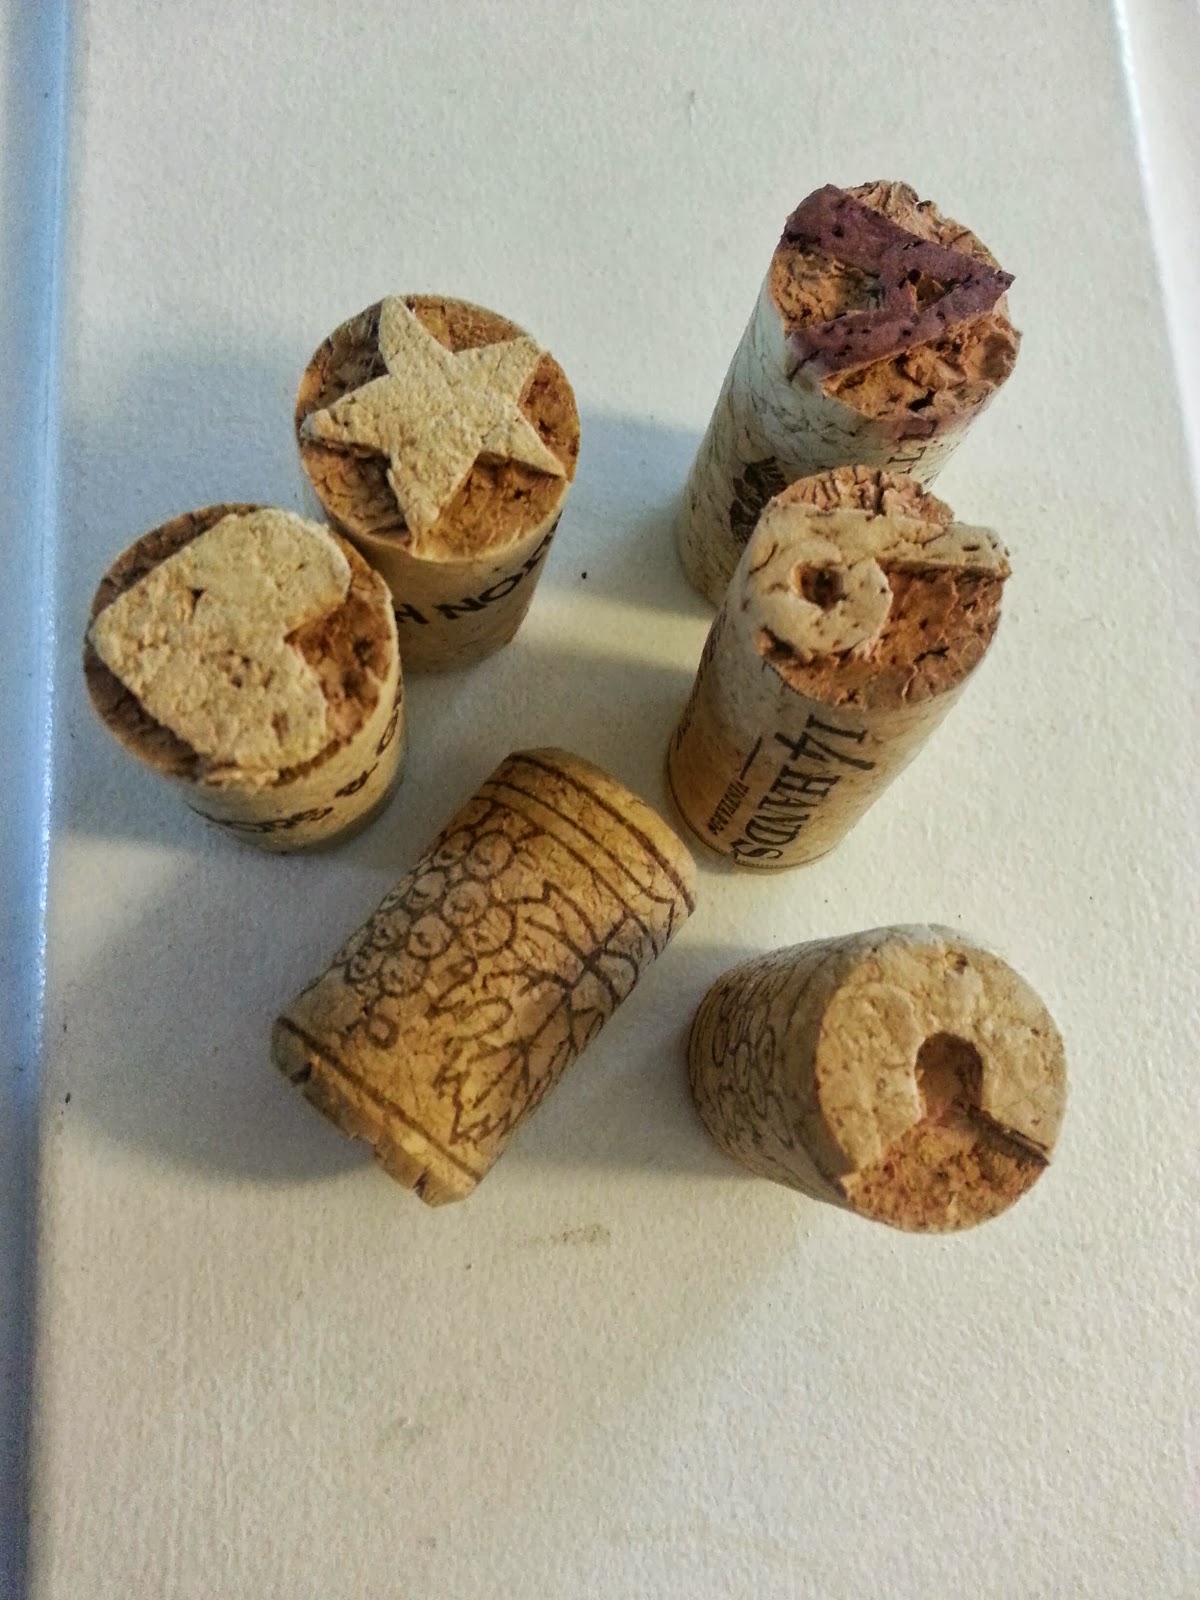
Number Stamps - (I used ones I had made out of corks. You can find the post for that here: DIY Stamps)
Red & White Paint 
Sparkles, Glitter, Ribbons, etc

Instructions:

Step 1 - Paint all your clothespins. I pinned them onto an old box so I could do the sides and everything all in one go. Don't worry about the backs you'll be gluing them down later. I did a mix of all red, white with sparkles, and plain wood with little snowflake punch outs.

Step 2 - Paint your board & let that dry completely dry (a few hours depending on the type of paint) I used some leftover house paint which actually dried super fast. I needed two coats to get a nice matte finish.


Step 3 - Finish off your board by added your number stamps and possibly some distressing with sandpaper if you like that look. With a 4 ft board I spaced my numbers a little less than 2 inches apart to get a nice even spacing. It's worth it to measure and mark this off to get it even. Otherwise you'll end up with a wonky looking board

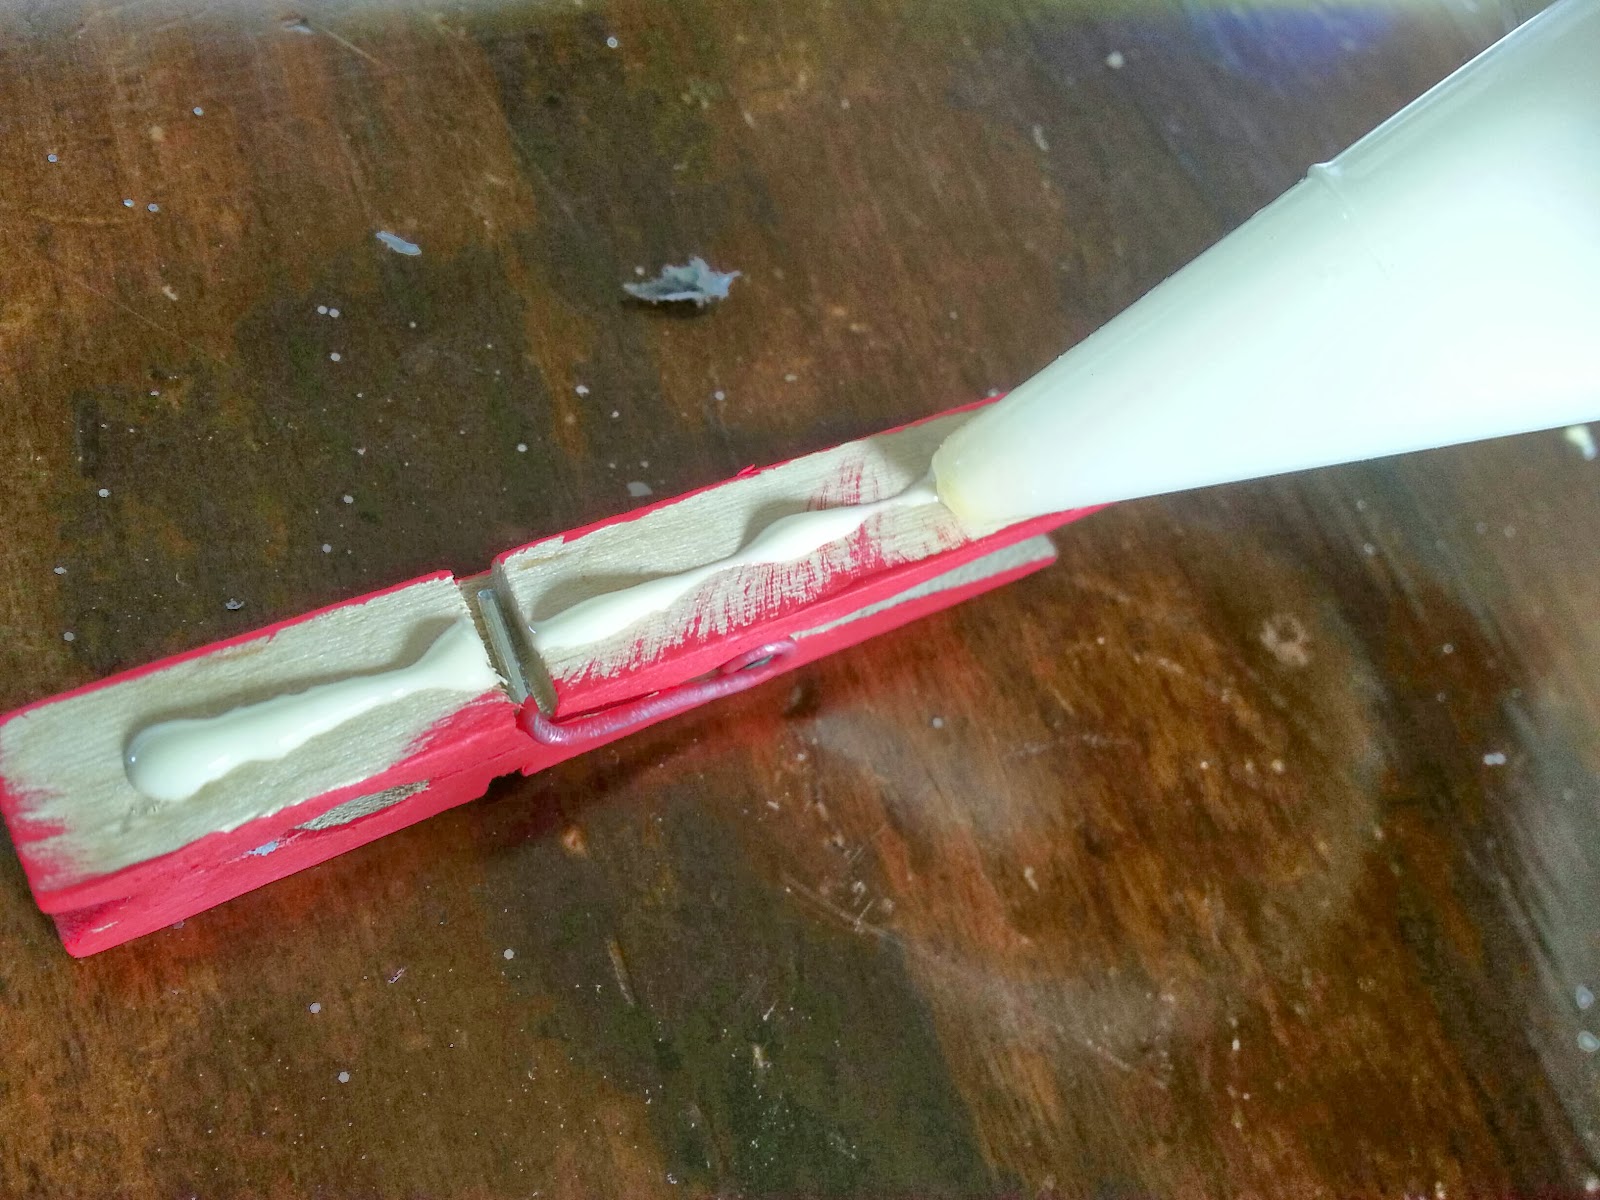
Step 4 - Glue on your pins. Plain old wood glue works like a charm here. Make sure your pins paint is completely dry before gluing. And again, marking off your spacing will help keeps things looking neat.

Step 5 - Fill with treats of your choice. Chocolates, small gifts, notes, letters, or even spell out the advent story in 24 days to read aloud each day (Find a link for that story here: Advent Story)

Merry Christmas!!

Thursday, November 21, 2013

Life Hack #1

Incidentally... During the making of the last post I discovered something I wish that I had learned long ago. I will take credit for this genius (so don't tell me if you already knew this because I'm living in the glorious cloud of discovery)

Nail Polish Remover (the I used had Acetone) ALSO removes that sticky, gummy, residue left from stickers/labels with ULTIMATE EASE!

I've never really been one for the life hack pins, but this is worth it. I never to need to struggle to scrap off that icky goo or look for the little bottle of goo-be-gone again!


Wednesday, November 20, 2013

Glass Jar Picture Frames

Catching up from last week's missed "Pinteresting" craft of the week.  

I like this because the photos are so easy to change (easier than picture frames even! - and that's saying something) AND you can keep adding to your collection whenever you get an interesting jar. I'm particularly smitten with the tiny jar from a sample of maple butter my sister gave me once <3 p="">


Friday, November 08, 2013

Revered Pewter

Before and After


First you should try and picture this in your head: A shockingly lime green house with a red brick fireplace. Now paint over that shocking lime green with pasty peach. But do it poorly so that your lovely peach colour ends up smeared on the ceiling, the underside of the window trims, and some of the green still pokes through if you look for it. Also leave the back side of the fireplace green.

Got it?

Now imagine that. 

A red brick fireplace with the back side shocking lime with peach EVERYWHERE else

Welcome to my home :)

Needless to say the peach must go! I've slowly been painting over it all with this lovely colour from Benjamin Moore called "Revered Pewter" It's a fantastic "greige" as is so popular right now. So fantastic in fact that it was the same colour my sister painted her beautiful home. In all fairness she painted first, but I didn't know the colour name until she saw my paint job and asked me. Discovering we had picked the same colour! I guess good taste runs in the family.

As switching up the tiles is a big job they'll stay for now. But it's been a fun process to see the house transform with just a coat of paint. I LOVE painting with Benjamore Moore Aura paint. It's so stellar. Really just a coat and a bit. Which is awesome because I can only ever paint for about an hour at time while the babe naps.

The peach is almost gone now. Just the bathroom left to go, and touching up the mess that was left on the trim. Seriously people! If you can't edge well... TAPE! (rant over.)


Saturday, November 02, 2013

Little Koala

Halloween 2013. My internal brain dialogue went something like this:

"Meh, I haven't dressed up for halloween for awhile..."
"The baby doesn't need a costume. He's not going trick or treating."
"Um... but it's his first halloween! What kind of mother are you!?"
"Okay... but it's the morning of Halloween. I didn't do this ahead of time! Shoot!"
"I can probably pull off that koala idea... oh no! He's awake."
"Okay, lets do this. Sewing the costume while the baby is awake. Perfect. Not."

But it all worked out in the end. And here are the basics so you too can have yourself a little koala :) It turned out so cute I might just keep the toque going for a while and pull out the ears after Halloween.

You'll need: 
1 white baby toque
2 black buttons (for eyes)
1 pair of grey baby socks
Some black fabric or felt for the nose
Grey Clothing (I taped the white patch on the tummy, but stitched on felt would probably be nicer if you were more on the ball than me and thought ahead of time)

Stitch it up, find your green and brown garb, grab yourself some leaves to make a crown and Voila! Baby Koala in the Tree :) I'm pretty proud of this one actually...


I thought the grey socks added a cute touch for the legs instead of pants. (also I didn't have grey baby pants that fit) And who can resist a cute baby diaper bum? 


He certainly seemed to like think it was a pretty swell costume. And now this mama can tell her son that he had a first halloween costume. Crisis averted!

Friday, October 25, 2013

That delightful aroma of a fresh cup...

Is there anything better than the smell of a freshly brewed cup of coffee? It's pretty high there on my list of favorite smells,  so when I saw this idea I pinned it to try sometime. That sometime was this week! 

The previous pinner said "I placed a vanilla tea-light in with the beans and was wanted by a lovely French vanilla coffee aroma." Well that sounds awesome I thought to myself.  Although I've meet been a huge fan of flavored coffee or candles so I thought I'd try just plain unscented lights instead.  

PINTEREST FAIL

I'm pretty sure this pinner ONLY smelled the  heavily scented vanilla and no coffee because I got nothing.  No vanilla and definitely no coffee. I did have the lovely ambience from the candles though.  Better luck might time. 

Saturday, October 19, 2013

DIY Hanging Mail Organizer

This was the first thing I pinned onto a board entitled "Organize My Life Beautifully"... and then promptly didn't organize my life at all... instead I switched jobs, bought a new house, moved, and had a baby and my life got a little less organized. However, we are settled into our new place and my son is now almost 7 months are we are getting back on track. In fact I think all the boxes are even unpacked now!

In any case this was a CHEAP (and easy) project that fulfills a need. My counter & desktops typically have been looking like this as of late: 

And I kinda wanted them to look more like this:


Enter the Hanging Mail Organizer. I should also mention that aside from hating clutter, I also despise dusting. Something I think was perhaps was drilled into my subconscious after many spring cleanings and visits from Grandma throughout my childhood. Dusting was the WORST job! So I didn't want a mail organizer that was another filing system to sit on the desk, but something I could hang on the wall and not have to dust around.  This one was straightforward and and inexpensive.

Total Cost: $1.00 (for the picture frame which I picked up at the thrift store)

Lucky for me this frame already had the perfect worn chabby-chic style I was looking for so I didn't even have to take the time to paint it. But I've seen this done with lovely vibrant colours as well. Really you can make it fit with whatever is going on in your house.

Supplies Needed:

Picture Frame
Fabric  to fit the size of your frame (& trim if you desire)
Staple Gun or Glue

Step 1: Cut your fabric to size with enough spare to wrap around the edges.

Step 2: Accordion fold to create pockets (whatever depth you desire) I wanted deeper pockets for mail, but you could also use more shallower pockets for jewelery or keys, or business cards. And line up any trims desired.

Step 3: IRON. As mentioned in previous posts. I dislike ironing with a passion. But in this case it will only even have to be ironed once and it makes a big difference to the final project.

Step 4:  Staple (or glue) your fabric around to the back. A Staple gun was handy for me, but my staples were a little deep so they poked through to the front. I had to staple close to the edge to hide them
behind the frame. It worked. Next time I would use shorter staples, or a glue gun would probably do the trick just fine!

Step 5: Assemble, Hang, Organize!


Finished Project!

Pin, Lose or Draw? Let me know what you think :)


Friday, October 11, 2013

Baby Led Weaning

Pinteresting Post of the week... Baby Food!

Our little guy is 6.5 months now and ready more than ever for solid food. Like leaping at the plate ready! As soon as he gets put in his highchair he is leaning as far forward as he can possible be with both hands reached out towards the table and his plate of food.

The basic idea of baby led weaning (BLW) is that rather than introduce your baby purree's, followed by mash, followed by bigger lumps, followed by solid food. You just go straight the solids! a.k.a. food introduction for the lazy mom :) Except that it's NOT the lazy way at all and right now creates a big mess as he learns how to navigate the 6-8 inches from table to mouth. Quite a bit of food currently ends up on the floor (we don't have a tray on our highchair it pulls right up to the table - which is great for storage and the eventuality that he will be at the table, but currently his pocket bib doesn't quite do justice what a tray might catch)

In any case, I'm always on the hunt for BLW ideas that will provide the nutrition he needs with the least amount of mess. Enter: Cucumber Ring! Someone had the ingenious idea to cut the seeds out of the middle (wasn't me) but this is AWESOME! Keeps him happy, busy, and healthy, and a nice slice of cold cucumber does wonders on the teething gums as well, double rainbow bonus :)


Another brilliant idea that I've found and cannot take credit for is:

The banana with a peel handle (no mushed banana here) This runs a close second to the cucumber ring.

Wednesday, October 02, 2013

DIY Never-ending Note Pad

Since I am definitely an old-school kinda pen and paper girl who still uses a grocery list at the store and only very recently made the switch to an e-calendar (mostly so that my husband and I would be on the same wave-length again) this appealed to me :)

Actually it reminds me of my grandma who, when I was a child, I remember having one of these hanging off the wall in her kitchen. Who'd thought to make their own! Now I won't have to take the time to fold and rip pieces of computer paper into appropriately sized smaller pieces that I can clip to the fridge to keep my running grocery list on.

All you need is a roll of paper (any office supply store), a piece of wood, a scrap of scapbooking paper, an elastic band, some glue or tape, a ribbon, and one of those black monster clip things... (what are they called?) It comes together QUICKLY! Like maybe 15 min. Quick and Simple.

So here was the "Pinsperation" for this week's DIY. A hanging never-ending notepad.  And the end result on the right beside it. I think this is a winner :)  (Just ignore the awful peach colour walls in the photo... that will be another weeks project)


Saturday, September 28, 2013

Cork Crafts!

So I had this gigantic pile of corks leftover from my wedding...
At the wedding they were turned into these:
And then I had all sorts of cork dreams like these: 

But ultimately I decided on this project because I've always wanted a stamp set, but have also always been too cheap to spend the $$$ on getting one... Probably once you factor in the time of carving the whole alphabet it's worth it just to get the stamp set, but this is definitely more fun!

Pin Lose or Draw? You decide!!


How'd I do?
  
pollcode.com free polls 


Tuesday, September 24, 2013

Jewellery Board Update

A little update on a project from a couple weeks ago. I did eventually get around to adding the burlap/lace bit that I wanted to on my jewellery board. I like it much better :) I originally had found some ribbon scraps that I threw on this piece just to give it a little something extra, but I never did like how it ended up... messy (and not the "cool, purposefully placed messy" just "I found some scraps and threw this together messy")

Wednesday, September 18, 2013

Envelopes!

I LOVE making & receiving handmade cards and handwritten letters. I'm pretty lousy at the handwritten letters part, but I have a stash of cards just ready to have the perfect occasion come up to send them. When I sit down to make one card I often end up making a few more just because the creative mood as struck. 

If there is one thing to be said for store bought cards though is that they come beautiful bound with matching envelopes the perfect size to store its contents. Oh Hallmark...

I have a whole board on Pinterest devoted to fun card ideas, and have lately realized that there are some mighty cool envelopes out there as well just ready for the making. So I decided to try a couple different styles. Here you go, let me know what you think, if you would use one over the other and definitely pass on some other sweet envelope designs that you have come across.

Envelope #1


This envelope was EASY PEASY and looks beautiful and intricate upon complete. It's really so simply.

  • Cut out 4 circles on the paper of your choice
  • Fold in half
  • Overlap them like closing a cardboard box
  • Glue in place
  • Done :)
I added some fancy fibers & ribbons to fancy this one up a bit, but you could definitely just fold it down and be done with it if you were in a rush. I also think this would be pretty sweet with multiple different papers, textures, and colours to add some pizazz. You can have some much fun with this design. 

Another BONUS to this one is that it's almost like a little gift box! You could stow a pair of earrings or other small gift inside the envelope to add that little something extra :)
I will definitely be using this design again in the future. You can easily make any size you want. Mine was big, but I think some small ones would be uber cute too.

Pin, Lose, Draw? Definitely a WINNER!


Envelope #2


This was was also so simple, who knew that the HEART was the secret to the perfect envelope shape! 

Envelope #2 took me back to elementary school where I first learned to draw a symmetrical heart. 

1. Fold the paper hot dog ways (as opposed to hamburger fold)
2. Draw half a heart
3. Cut out = automatic symmetry
After making your heart shape fold in the sides, fold up the bottom, glue in place, VOILA! You have pretty much the quickest, easy, envelope ever.

I dig this one a lot. But I did notice a downfall... I cut my heart on a 12x12 piece of scrapbook paper and my ending envelope size was not as big as I was expecting... You definitely couldn't fit a normal size card in there, but you could fit a lovely handwritten note for sure. AND if you knew ahead of time your envelope size you could make a card to match (not to future crafty self...)

Pin, Lose, Draw? I vote this one a WINNER due to least materials, quickest time, and ease of making. But it's not my favourite for a special occasion.


Well folks, there you have it. Two different envelope styles. I'm pretty stoked to stockpile my envelope stash to match my card stash now. May I (and you) never again get into the pickle of having a card without an envelope :)

Wednesday, September 11, 2013

Gluten Free Treats!

I was originally thinking that this would be more of a incentive to "get my craft on" so to speak, but one of the boards I pin to is called "Things that Look Nummy" and while I am typically distrusting of many online recipes... I had a wonderful friend (who also happens to have Celiac disease) babysitting for me. I wanted to thank her with a tasty GF treat so I thought I go to my pin board and see what I could find. Gluten Free seems to have been a bit of trend lately in the foodie and diet worlds (even for those who don't necessitate a GF diet) and there are plenty of tasty looking recipes out there that would tempt even the most bread, meat, and cheese kinda guy :)

I thought I should try my recipe out first on my husband and myself before preparing a "treat" for someone else (just in case it was a major flop) So I found this delicious looking "Cheesy Garlic Cauliflower Breadsticks" recipe and thought it would be a winner.... turns out not exactly as I thought it would be. It was tasty, however I was hoping it would be more crispy like breadsticks, and it turned out a little more omelette-y... we did eat it but I decided that it wasn't going to be what I would serve my stellar babysitter the next night. Pin, Lose or Draw? LOSE...
But now I was running out of time to do a trial run of my creation before hand so I took a gamble on this Gluten Free Dairy Free Pumpkin Cupcake recipe and it was DELICIOUS!! So good. I will definitely be making this one again. They pretty much taste like pumpkin doughnuts :) I switched up the icing from the recipe though and did a maple glaze (maple syrup mixed with icing sugar... yes sugar mixed with sugar) and like I said this is definitely going in the recipe box.  
They were the perfect craving kicker that this fall weather has been kicking up and would go wonderfully with a Pumpkin Spice Latte (if you love pumpkin as much as I do anyways). 

Happy Eating <3 p="">
Sarah.

Tuesday, September 03, 2013

Jewellery Wall Organizer

Okay... So I think I'm a day late here. However I'm going to say its because of the holiday weekend :) I think I pinned this sometime last summer, but never had the wall space to hang it up so I never bothered to make it. But in in our new place I have more blank walls and less character molding so I have room to finally do (and then display) some of these things. 

The motivation behind this project is the fact that I HATE CLUTTER... that being said I have plenty of it. Fail. However, this stellar project will get rid of all those cardboard jewellery boxes sitting on my dresser and display my adornments in a place that hopefully means that will get worn a little more often as I am reminded of some of the beautiful pieces that I have.

Again, I prefer not to spend lots of $$$ on these projects as I have all sorts of "junk" & scraps lying around the house waiting to be turned into something beautiful. So this project cost me $0.00 so far. I think I might go find better ribbon option for the top though 'cause I'm not happy with the outcome currently, but I'll have to search around a bit for what I'm looking for. Until then the ribbon concoction on the top is a temporary fix.

Here was the progress:

1. Found piece of plywood (from my husbands garage deconstruction - reconstruction to music studio project). Wrapped in scrap fleece interfacing from a diaper bag & tone on tone ivory damask fabric from some pillows I did about 5 years ago... Is that a reasonable length of time to hold onto scraps? How often do you purge your scrap supplies? The interfacing gave it a little cushion. I didn't want to add too much batting and make it look upholstered, but I did want a little softness.

2. Ironed the fabric (don't want those creases and didn't think they'd pull out when I stapled the fabric) I pretty much despise ironing and normally I skip it whenever possible, but I thought it might be worth it this time.

3. Stapled my fabric onto the ply. Start with the middle of top & sides, and then work towards the corners. Corners are tricky, but I think I have it down now and really like my technique.

I'll outline the corner technique here:

1.  Working from the middle of top and sides evenly stretch out your fabric. You shouldn't really need to pull any from the corner, just make them look tidy.

2. Using an origami fold like this squash fold, gently fold down your corners.

3. Staple each side and then the top to get a triangle. You can then add a couple more staples and/or trim the extra fabric.

4. You're done! (Sometimes it takes a couple tries to be happy and no weird wrinkles on the top, but if you just use the three staple technique it's less to un-pick and re-do each time and then when you're happy you can add the extra hold if desired.

To finish 'er off:

1. Next I had some old hardware kicking around from when I replaced the kitchen hardware in my house (again about 5 years ago) I cleaned it up and placed it around the board until I was happy.

2. I made some pen marks where I wanted my holes and then cut the fabric with a utility knife so the drill wouldn't rip and pull the fabric while I was drilling my holes.

3. Drilled the holes and screwed in the hardware.

4. Hang & Decorate :)

I just had some old ribbon kicking around that I added as a decor to the top, but I'm not happy with this modge-podge of ribbons. I think I'd like to add some burlap and lace for that rustic/pretty feel. I think it'll go well with the damask too. I'll keep you posted when I find what I'm looking for.

Be pinspired!!


How'd I do?
  
pollcode.com free polls